Setting up a Testing Environment for iOS Apps
In the previous chapter, we provided an overview of the iOS platform and described the structure of iOS apps. In this chapter, we'll introduce basic processes and techniques you can use to test iOS apps for security flaws. These basic processes are the foundation for the more detailed test cases outlined in the following chapters.
Unlike the Android emulator, which fully emulates the hardware of an actual Android device, the iOS SDK simulator offers a higher-level simulation of an iOS device. Most importantly, emulator binaries are compiled to x86 code instead of ARM code. Apps compiled for a real device don't run, making the simulator useless for black box analysis and reverse engineering.
The following is the minimum iOS app testing setup:
- laptop with admin rights
- Wi-Fi network that permits client-to-client traffic (or USB multiplexing)
- at least one jailbroken iOS device (of the desired iOS version)
- Burp Suite or other interception proxy tool
Although you can use a Linux or Windows machine for testing, you'll find that many tasks are difficult or impossible on these platforms. In addition, the XCode development environment and the iOS SDK are only available for macOS. This means that you'll definitely want to work on a Mac for source code analysis and debugging (it also makes black box testing easier).
Jailbreaking an iOS Device
You should have a jailbroken iPhone or iPad for running tests. These devices allow root access and tool installation, making the security testing process more straightforward. If you don't have access to a jailbroken device, you can apply the workarounds described later in this chapter, but be prepared for a difficult experience.
iOS jailbreaking is often compared to Android rooting, but the process is actually quite different. To explain the difference, we'll first review the concepts of "rooting" and "flashing" on Android.
- Rooting: This typically involves installing the
subinary on the existing system or replacing the whole system with a rooted custom ROM. Normally, exploits aren't required to obtain root access as long as the bootloader is accessible. - Flashing custom ROMs (which may be rooted already): This allows you to replace the OS that's running on the device after unlocking the bootloader (which may require an exploit).
On iOS devices, flashing a custom ROM isn't possible because the iOS bootloader only allows Apple-signed images to be booted and flashed. This is why even official iOS images can't be installed if they aren't signed by Apple, and it often makes iOS downgrades impossible.
The purpose of jailbreaking is to disable iOS system protections (Apple's code signing mechanisms in particular) so that arbitrary unsigned code can run on the device. The word "jailbreak" is a colloquial reference to all-in-one tools that automate the disabling process.
Cydia is an alternative app store developed by Jay Freeman ("saurik") for jailbroken devices. It provides a graphical user interface and a version of the Advanced Packaging Tool (APT). You can easily access many "unsanctioned" app packages on Cydia. Most jailbreak tools install Cydia automatically.
Developing a jailbreak for any given version of iOS is not easy. As a security tester, you'll most likely want to use publicly available jailbreak tools. Still, we recommend studying the techniques that have been used to jailbreak various versions of iOS—you'll encounter many interesting exploits and learn a lot about OS internals. For example, Pangu9 for iOS 9.x exploited at least five vulnerabilities, including a use-after-free kernel bug (CVE-2015-6794) and an arbitrary file system access vulnerability in the Photos app (CVE-2015-7037).
Benefits of Jailbreaking
End users often jailbreak their devices to tweak the iOS system appearance, add new features, and install third-party apps from unofficial app stores. For a security tester, however, jailbreaking an iOS device has even more benefits. They include, but aren't limited to, the following:
- root access to the file system
- possibility to execute applications that haven't been signed by Apple (which includes many security tools)
- unrestricted debugging and dynamic analysis
- access to the Objective-C runtime
Jailbreak Types
There are tethered, semi-tethered, semi-untethered, and untethered jailbreaks.
Tethered jailbreaks don't persist through reboots, so re-applying jailbreaks requires the device to be connected (tethered) to a computer during every reboot. The device may not reboot at all if the computer is not connected.
Semi-tethered jailbreaks can't be re-applied unless the device is connected to a computer during reboot. The device can also boot into non-jailbroken mode on its own.
Semi-untethered jailbreaks allow the device to boot on its own, but the kernel patches for disabling code signing aren't applied automatically. The user must re-jailbreak the device by starting an app or visiting a website.
Untethered jailbreaks are the most popular choice for end users because they need to be applied only once, after which the device will be permanently jailbroken.
Caveats and Considerations
Jailbreaking an iOS device is becoming more and more complicated because Apple keeps hardening the system and patching the exploited vulnerabilities. Jailbreaking has become a very time-sensitive procedure because Apple stops signing these vulnerable versions within relatively short time intervals (unless they are hardware-based vulnerabilities). This means that you can't downgrade to a specific iOS version once Apple stops signing the firmware.
If you have a jailbroken device that you use for security testing, keep it as is unless you're 100% sure that you can re-jailbreak it after upgrading to the latest iOS version. Consider getting a spare device (which will be updated with every major iOS release) and waiting for a jailbreak to be released publicly. Once a jailbreak is released publicly, Apple is usually quick to release a patch, so you have only a couple of days to upgrade to the affected iOS version and apply the jailbreak.
iOS upgrades are based on a challenge-response process. The device will allow the OS installation only if the response to the challenge is signed by Apple. This is what researchers call a "signing window," and it is the reason you can't simply store the OTA firmware package you downloaded via iTunes and load it onto the device whenever you want to. During minor iOS upgrades, two versions may both be signed by Apple. This is the only situation in which you can downgrade the iOS device. You can check the current signing window and download OTA firmware from the IPSW Downloads website.
Which Jailbreaking Tool to Use
Different iOS versions require different jailbreaking techniques. Determine whether a public jailbreak is available for your iOS version. Beware of fake tools and spyware, which are often hiding behind domain names that are similar to the name of the jailbreaking group/author.
The jailbreak Pangu 1.3.0 is available for 64-bit devices running iOS 9.0. If you have a device that's running an iOS version for which no jailbreak is available, you can still jailbreak the device if you downgrade or upgrade to the target jailbreakable iOS version (via IPSW download and iTunes). However, this may not be possible if the required iOS version is no longer signed by Apple.
The iOS jailbreak scene evolves so rapidly that providing up-to-date instructions is difficult. However, we can point you to some sources that are currently reliable.
Note that OWASP and the MSTG won't be responsible if you end up bricking your iOS device!
Dealing with Jailbreak Detection
Some apps attempt to detect whether the iOS device on which they're running is jailbroken. This is because jailbreaking deactivates some of iOS' default security mechanisms. However, there are several ways to get around this detection, and we'll introduce techniques for doing so in the chapters "Reverse Engineering and Tampering on iOS" and "Testing Anti-Reversing Defenses on iOS."
Jailbroken Device Setup
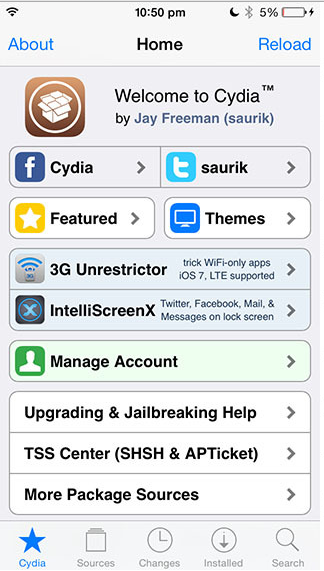
- Cydia Store
Once you've jailbroken your iOS device and Cydia is installed (as shown in the screenshot above), proceed as follows:
- From Cydia install aptitude and openssh.
- SSH into your iDevice.
- Default users are
rootandmobile - Default password is
alpine
- Default users are
- Change the default password for users
rootandmobile. - Add the following repository to Cydia:
https://build.frida.re. - Install Frida from Cydia.
Cydia allows you to manage repositories. One of the most popular repositories is BigBoss. If your Cydia installation isn't pre-configured with this repository, you can add it by navigating to "Sources" -> "Edit", then clicking "Add" on the top left and entering the following URL:
http://apt.thebigboss.org/repofiles/cydia/
You may also want to add the HackYouriPhone repository to get the AppSync package:
http://repo.hackyouriphone.org
The following are some useful packages you can install from Cydia to get started:
- BigBoss Recommended Tools: A list of hacker tools that installs many useful command line tools. Includes standard Unix utilities that are missing from iOS, including wget, unrar, less, and sqlite3 client.
- adv-cmds: Advanced command line. Includes finger, fingerd, last, lsvfs, md, and ps.
- IPA Installer Console: Tool for installing IPA application packages from the command line. Package name is
com.autopear.installipa. - Class Dump: A command line tool for examining the Objective-C runtime information stored in Mach-O files.
- Substrate: A platform that makes developing third-party iOS addons easier.
- cycript: Cycript is an inlining, optimizing, JavaScript-to-JavaScript compiler and immediate-mode console environment that can be injected into running processes.
- AppList: Allows developers to query the list of installed apps and provides a preference pane based on the list.
- PreferenceLoader: A MobileSubstrate-based utility that allows developers to add entries to the Settings application, similar to the SettingsBundles that AppStore apps use.
- AppSync Unified: Allows you to sync and install unsigned iOS applications.
Your workstation should have at least the following installed:
- SSH client
- an interception proxy. In this guide, we'll be using BURP Suite.
Other useful tools we'll be referring to throughout the guide:
Static Analysis
The preferred method of statically analyzing iOS apps is using the original the XCode project files. Ideally, you will be able to compile and debug the app to quickly identify any potential issues with the source code.
Black box analysis of iOS apps without access to the original source code requires reverse engineering. For example, no decompilers are available for iOS apps, so you must be able to read assembly code for a deep inspection. We won't go into too much detail about that in this chapter, but we will revisit the topic in the chapter "Reverse Engineering and Tampering on iOS."
The static analysis instructions in the following chapters are based on the assumption that the source code is available.
Automated Static Analysis Tools
Several automated tools for analyzing iOS apps are available; most of them are commercial tools. The free and open source tools MobSF and Needle have some static and dynamic analysis functionality. Some additional products are listed in the "Static Source Code Analysis" section of the "Testing Tools" Appendix.
Don't shy away from using automated scanners for your analysis—they help you pick low-hanging fruit and allow you to focus on the more interesting aspects of analysis, such as the business logic. Keep in mind that static analyzers may produce false positives and false negatives; always review the findings carefully.
Dynamic Analysis of Jailbroken Devices
Life is easy with a jailbroken device: not only do you gain easy access to the app's sandbox, the lack of code signing allows you to use more powerful dynamic analysis techniques. On iOS, most dynamic analysis tools are built on top of Cydia Substrate, a framework for developing runtime patches that we will cover later. For basic API monitoring, you can get away with not knowing all the details of how Substrate works—you can simply use existing API monitoring tools built on top of it.
SSH Connection via USB
During a real black box test, a reliable Wi-Fi connection may not be available. In this situation, you can use usbmuxd to connect to your device's SSH server via USB.
Usbmuxd is a socket daemon that monitors USB iPhone connections. You can use it to map the mobile device's localhost listening sockets to TCP ports on your host machine. This allows you to conveniently SSH into your iOS device without setting up an actual network connection. When usbmuxd detects an iPhone running in normal mode, it connects to the phone and begins relaying requests that it receives via /var/run/usbmuxd.
Connect to an iOS device on macOS by installing and starting iproxy:
$ brew install libimobiledevice
$ iproxy 2222 22
waiting for connection
The above command maps port 22 on the iOS device to port 2222 on localhost. With the following command, you should be able to connect to the device:
$ ssh -p 2222 root@localhost
root@localhost's password:
iPhone:~ root#
Connecting to your iPhone via USB is also possible via Needle.
App Folder Structure
System applications are in the directory "/Applications." You can use IPA Installer Console to identify the installation folder for user-installed apps (available under /private/var/mobile/Containers/ since iOS 9). Connect to the device via SSH and run the ipainstaller command (same command as installipa) as follows:
iPhone:~ root# ipainstaller -l
...
sg.vp.UnCrackable1

iPhone:~ root# ipainstaller -i sg.vp.UnCrackable1
...
Bundle: /private/var/mobile/Containers/Bundle/Application/A8BD91A9-3C81-4674-A790-AF8CDCA8A2F1
Application: /private/var/mobile/Containers/Bundle/Application/A8BD91A9-3C81-4674-A790-AF8CDCA8A2F1/UnCrackable Level 1.app
Data: /private/var/mobile/Containers/Data/Application/A8AE15EE-DC8B-4F1C-91A5-1FED35258D87
As you can see, the user-installed apps contain two main subdirectories (plus the Shared subdirectory since iOS 9). The Application subdirectory, inside the Bundle subdirectory, reflects the app name (in the <name>.app subdirectory):
BundleData
The Application directory is a bundle subdirectory. The static installer files are in the Application directory, and all user data is in the Data directory.
The random string in the URI is the application's GUID. Every app installation has a unique GUID. There is no relationship between the Bundle GUID and the Data GUID for the same app.
Copying App Data Files
An app's files are stored in the app's Data directory. To identify the correct path, SSH into the device and use IPA Installer Console to retrieve the package information (as shown previously):
iPhone:~ root# ipainstaller -l
...
sg.vp.UnCrackable1

iPhone:~ root# ipainstaller -i sg.vp.UnCrackable1
Identifier: sg.vp.UnCrackable1
Version: 1
Short Version: 1.0
Name: UnCrackable1
Display Name: UnCrackable Level 1
Bundle: /private/var/mobile/Containers/Bundle/Application/A8BD91A9-3C81-4674-A790-AF8CDCA8A2F1
Application: /private/var/mobile/Containers/Bundle/Application/A8BD91A9-3C81-4674-A790-AF8CDCA8A2F1/UnCrackable Level 1.app
Data: /private/var/mobile/Containers/Data/Application/A8AE15EE-DC8B-4F1C-91A5-1FED35258D87
You can now simply archive the Data directory and pull it from the device with scp:
iPhone:~ root# tar czvf /tmp/data.tgz /private/var/mobile/Containers/Data/Application/A8AE15EE-DC8B-4F1C-91A5-1FED35258D87
iPhone:~ root# exit
$ scp -P 2222 root@localhost:/tmp/data.tgz .
Dumping KeyChain Data
Keychain-Dumper lets you dump a jailbroken device's KeyChain contents. The easiest way to get the tool is to download the binary from its GitHub repo:
$ git clone https://github.com/ptoomey3/Keychain-Dumper
$ scp -P 2222 Keychain-Dumper/keychain_dumper root@localhost:/tmp/
$ ssh -p 2222 root@localhost
iPhone:~ root# chmod +x /tmp/keychain_dumper
iPhone:~ root# /tmp/keychain_dumper

(...)

Generic Password
----------------
Service: myApp
Account: key3
Entitlement Group: RUD9L355Y.sg.vantagepoint.example
Label: (null)
Generic Field: (null)
Keychain Data: SmJSWxEs

Generic Password
----------------
Service: myApp
Account: key7
Entitlement Group: RUD9L355Y.sg.vantagepoint.example
Label: (null)
Generic Field: (null)
Keychain Data: WOg1DfuH
Note that this binary is signed with a self-signed certificate that has a "wildcard" entitlement. The entitlement grants access to all items in the Keychain. If you are paranoid or have very sensitive private data on your test device, you may want to build the tool from source and manually sign the appropriate entitlements into your build; instructions for doing this are available in the GitHub repository.
Installing Frida
Frida is a runtime instrumentation framework that lets you inject JavaScript snippets or portions of your own library into native Android and iOS apps. If you've already read the Android section of this guide, you should be quite familiar with this tool.
If you haven't already done so, you need to install the Frida Python package on your host machine:
$ pip install frida
To connect Frida to an iOS app, you need a way to inject the Frida runtime into that app. This is easy to do on a jailbroken device: just install frida-server through Cydia. Once it is installed, frida-server will automatically run with root privileges, allowing you to easily inject code into any process.
Start Cydia and add Frida's repository by navigating to Manage -> Sources -> Edit -> Add and entering https://build.frida.re. You should then be able to find and install the Frida package.
Connect your device via USB and make sure that Frida works by running the frida-ps command. This should return the list of processes running on the device:
$ frida-ps -U
PID  Name
---  ----------------
963  Mail
952  Safari
416  BTServer
422  BlueTool
791  CalendarWidget
451  CloudKeychainPro
239  CommCenter
764  ContactsCoreSpot
(...)
We'll demonstrate a few more uses for Frida below, but let's first look at what you should do if you're forced to work on a non-jailbroken device.
Dynamic Analysis on Non-Jailbroken Devices
If you don't have access to a jailbroken device, you can patch and repackage the target app to load a dynamic library at startup. This way, you can instrument the app and do pretty much everything you need to do for a dynamic analysis (of course, you can't break out of the sandbox this way, but you won't often need to). However, this technique works only if the app binary isn't FairPlay-encrypted (i.e., obtained from the app store).
Thanks to Apple's confusing provisioning and code signing system, re-signing an app is more challenging than one would expect. iOS won't run an app unless you get the provisioning profile and code signature header exactly. This requires learning many concepts—certificate types, BundleIDs, application IDs, team identifiers, and how Apple's build tools connect them. Suffice it to say, getting the OS to run a binary that hasn't been built via the default method (Xcode) can be a daunting process.
We're going to use optool, Apple's build tools, and some shell commands. Our method is inspired by Vincent Tan's Swizzler project. The NCC group has described an alternative repackaging method.
To reproduce the steps listed below, download UnCrackable iOS App Level 1 from the OWASP Mobile Testing Guide repo. Our goal is to make the UnCrackable app load FridaGadget.dylib during startup so we can instrument it with Frida.
Please note that the following steps are applicable to macOS only. Xcode is available for macOS only.
Getting a Developer Provisioning Profile and Certificate
The provisioning profile is a plist file signed by Apple. It whitelists your code signing certificate on one or more devices. In other words, this represents Apple's explicitly allowing your app to run for certain reasons, such as debugging on selected devices (development profile). The provisioning profile also includes the entitlements granted to your app. The certificate contains the private key you'll use to sign.
Depending on whether you're registered as an iOS developer, you can obtain a certificate and provisioning profile in one of the following ways:
With an iOS developer account:
If you've developed and deployed iOS apps with Xcode before, you already have your own code signing certificate installed. Use the security tool to list your signing identities:
$ security find-identity -p codesigning -v
  1) 61FA3547E0AF42A11E233F6A2B255E6B6AF262CE "iPhone Distribution: Vantage Point Security Pte. Ltd."
  2) 8004380F331DCA22CC1B47FB1A805890AE41C938 "iPhone Developer: Bernhard Müller (RV852WND79)"
Log into the Apple Developer portal to issue a new App ID, then issue and download the profile. An App ID is a two-part string used consisting of a Team ID supplied by Apple and a bundle ID search string that you can set to an arbitrary value, such as com.example.myapp. Note that you can use a single App ID to re-sign multiple apps. Make sure you create a development profile and not a distribution profile so that you can debug the app.
In the examples below, I use my own signing identity, which is associated with my company's development team. I created the app-id "sg.vp.repackaged" and the provisioning profile "AwesomeRepackaging" for these examples. I ended up with the file AwesomeRepackaging.mobileprovision—replace this with your own filename in the shell commands below.
With a Regular iTunes Account:
Apple will issue a free development provisioning profile even if you're not a paying developer. You can obtain the profile with Xcode and your regular Apple account: simply create an empty iOS project and extract embedded.mobileprovision from the app container, which is in the Xcode subdirectory of your home directory: ~/Library/Developer/Xcode/DerivedData/<ProjectName>/Build/Products/Debug-iphoneos/<ProjectName>.app/. The NCC blog post "iOS instrumentation without jailbreak" explains this process in great detail.
Once you've obtained the provisioning profile, you can check its contents with the security tool. Besides the allowed certificates and devices, you'll find the entitlements granted to the app in the profile. You'll need those for code signing, so extract them to a separate plist file as shown below. Have a look at the file contents to make sure everything is as expected.
$ security cms -D -i AwesomeRepackaging.mobileprovision > profile.plist
$ /usr/libexec/PlistBuddy -x -c 'Print :Entitlements' profile.plist > entitlements.plist
$ cat entitlements.plist
<?xml version="1.0" encoding="UTF-8"?>
<!DOCTYPE plist PUBLIC "-//Apple//DTD PLIST 1.0//EN" "http://www.apple.com/DTDs/PropertyList-1.0.dtd">
<plist version="1.0">
<dict>
    <key>application-identifier</key>
    <string>LRUD9L355Y.sg.vantagepoint.repackage</string>
    <key>com.apple.developer.team-identifier</key>
    <string>LRUD9L355Y</string>
    <key>get-task-allow</key>
    <true/>
    <key>keychain-access-groups</key>
    <array>
        <string>LRUD9L355Y.*</string>
    </array>
</dict>
</plist>
Note the application identifier, which is a combination of the Team ID (LRUD9L355Y) and Bundle ID (sg.vantagepoint.repackage). This provisioning profile is only valid for the app that has this app id. The "get-task-allow" key is also important—when set to "true," other processes, such as the debugging server, are allowed to attach to the app (consequently, this would be set to "false" in a distribution profile).
Other Preparations
To make our app load an additional library at startup, we need some way of inserting an additional load command into the main executable's Mach-O header. Optool can be used to automate this process:
$ git clone https://github.com/alexzielenski/optool.git
$ cd optool/
$ git submodule update --init --recursive
$ xcodebuild
$ ln -s <your-path-to-optool>/build/Release/optool /usr/local/bin/optool
We'll also use ios-deploy, a tool that allows iOS apps to be deployed and debugged without Xcode:
$ git clone https://github.com/phonegap/ios-deploy.git
$ cd ios-deploy/
$ xcodebuild
$ cd build/Release
$ ./ios-deploy
$ ln -s <your-path-to-ios-deploy>/build/Release/ios-deploy /usr/local/bin/ios-deploy
The last line in optool and ios-deploy creates a symbolic link and makes the executable available system-wide.
Reload your shell to make the new commands available:
zsh: # . ~/.zshrc
bash: # . ~/.bashrc
To follow the examples below, you also need FridaGadget.dylib:
$ curl -O https://build.frida.re/frida/ios/lib/FridaGadget.dylib
Besides the tools listed above, we'll be using standard tools that come with macOS and Xcode. Make sure you have the Xcode command line developer tools installed.
Patching, Repackaging, and Re-Signing
Time to get serious! As you already know, IPA files are actually ZIP archives, so you can use any zip tool to unpack the archive. Copy FridaGadget.dylib into the app directory and use optool to add a load command to the "UnCrackable Level 1" binary.
$ unzip UnCrackable_Level1.ipa
$ cp FridaGadget.dylib Payload/UnCrackable\ Level\ 1.app/
$ optool install -c load -p "@executable_path/FridaGadget.dylib"  -t Payload/UnCrackable\ Level\ 1.app/UnCrackable\ Level\ 1
Found FAT Header
Found thin header...
Found thin header...
Inserting a LC_LOAD_DYLIB command for architecture: arm
Successfully inserted a LC_LOAD_DYLIB command for arm
Inserting a LC_LOAD_DYLIB command for architecture: arm64
Successfully inserted a LC_LOAD_DYLIB command for arm64
Writing executable to Payload/UnCrackable Level 1.app/UnCrackable Level 1...
Of course such blatant tampering invalidates the main executable's code signature, so this won't run on a non-jailbroken device. You'll need to replace the provisioning profile and sign both the main executable and FridaGadget.dylib with the certificate listed in the profile.
First, let's add our own provisioning profile to the package:
$ cp AwesomeRepackaging.mobileprovision Payload/UnCrackable\ Level\ 1.app/embedded.mobileprovision
Next, we need to make sure that the BundleID in Info.plist matches the one specified in the profile because the codesign tool will read the Bundle ID from Info.plist during signing; the wrong value will lead to an invalid signature.
$ /usr/libexec/PlistBuddy -c "Set :CFBundleIdentifier sg.vantagepoint.repackage" Payload/UnCrackable\ Level\ 1.app/Info.plist
Finally, we use the codesign tool to re-sign both binaries. Instead of "8004380F331DCA22CC1B47FB1A805890AE41C938," you need to use your signing identity, which you can output by executing the command security find-identity -p codesigning -v.
$ rm -rf Payload/UnCrackable\ Level\ 1.app/_CodeSignature
$ /usr/bin/codesign --force --sign 8004380F331DCA22CC1B47FB1A805890AE41C938  Payload/UnCrackable\ Level\ 1.app/FridaGadget.dylib
Payload/UnCrackable Level 1.app/FridaGadget.dylib: replacing existing signature
entitlements.plist is the file you created earlier, for your empty iOS project.
$ /usr/bin/codesign --force --sign 8004380F331DCA22CC1B47FB1A805890AE41C938 --entitlements entitlements.plist Payload/UnCrackable\ Level\ 1.app/UnCrackable\ Level\ 1
Payload/UnCrackable Level 1.app/UnCrackable Level 1: replacing existing signature
Installing and Running an App
Now you should be ready to run the modified app. Deploy and run the app on the device as follows:
$ ios-deploy --debug --bundle Payload/UnCrackable\ Level\ 1.app/
If everything went well, the app should launch in debugging mode with lldb attached. Frida should now be able to attach to the app as well. You can verify this with the frida-ps command:
$ frida-ps -U
PID  Name
---  ------
499  Gadget

Troubleshooting
When something goes wrong (and it usually does), mismatches between the provisioning profile and code signing header are the most likely causes. Reading the official documentation helps you understand the code signing process. Apple's entitlement troubleshooting page is also a useful resource.
Automated Repackaging with Objection
Objection is a mobile runtime exploration toolkit based on Frida. One of the best things about Objection is that it works even with non-jailbroken devices. It does this by automating the process of app repackaging with FridaGadget.dylib.
We won’t cover Objection in detail in this guide, but you can find exhaustive documentation on the official wiki pages and also how to repackage an IPA.
Method Tracing with Frida
Intercepting Objective-C methods is a useful iOS security testing technique. For example, you may be interested in data storage operations or network requests. In the following example, we'll write a simple tracer for logging HTTP(S) requests made via iOS standard HTTP APIs. We'll also show you how to inject the tracer into the Safari web browser.
In the following examples, we'll assume that you are working on a jailbroken device. If that's not the case, you need to first follow the steps outlined in the previous section to repackage the Safari app.
Frida comes with frida-trace, a ready-made function tracing tool. frida-trace accepts Objective-C methods via the -m flag. You can pass it wildcards as well—given -[NSURL *], for example, frida-trace will automatically install hooks on all NSURL class selectors. We'll use this to get a rough idea about which library functions Safari calls when the user opens a URL.
Run Safari on the device and make sure the device is connected via USB. Then start frida-trace as follows:
$ frida-trace -U -m "-[NSURL *]" Safari
Instrumenting functions...
-[NSURL isMusicStoreURL]: Loaded handler at "/Users/berndt/Desktop/__handlers__/__NSURL_isMusicStoreURL_.js"
-[NSURL isAppStoreURL]: Loaded handler at "/Users/berndt/Desktop/__handlers__/__NSURL_isAppStoreURL_.js"
(...)
Started tracing 248 functions. Press Ctrl+C to stop.
Next, navigate to a new website in Safari. You should see traced function calls on the frida-trace console. Note that the initWithURL: method is called to initialize a new URL request object.
           /* TID 0xc07 */
  20313 ms  -[NSURLRequest _initWithCFURLRequest:0x1043bca30 ]
 20313 ms  -[NSURLRequest URL]
(...)
 21324 ms  -[NSURLRequest initWithURL:0x106388b00 ]
 21324 ms     | -[NSURLRequest initWithURL:0x106388b00 cachePolicy:0x0 timeoutInterval:0x106388b80
We can look up the declaration of this method on the Apple Developer Website:
- (instancetype)initWithURL:(NSURL *)url;
The method is called with a single argument of type NSURL. According to the documentation, the NSRURL class has a property called absoluteString whose value should be the absolute URL represented by the NSURL object.
We now have all the information we need to write a Frida script that intercepts the initWithURL: method and prints the URL passed to the method. The full script is below. Make sure you read the code and inline comments to understand what's going on.
import sys
import frida


// JavaScript to be injected
frida_code = """

    // Obtain a reference to the initWithURL: method of the NSURLRequest class
    var URL = ObjC.classes.NSURLRequest["- initWithURL:];

    // Intercept the method
    Interceptor.attach(URL.implementation, {
      onEnter: function(args) {

          // We should always initialize an autorelease pool before interacting with Objective-C APIs

        var pool = ObjC.classes.NSAutoreleasePool.alloc().init();

        var NSString = ObjC.classes.NSString;

        // Obtain a reference to the NSLog function, and use it to print the URL value
        // args[2] refers to the first method argument (NSURL *url)

        var NSLog = new NativeFunction(Module.findExportByName('Foundation', 'NSLog'), 'void', ['pointer', '...']);

        NSLog(args[2].absoluteString_());

        pool.release();
      }
    });


"""

process = frida.get_usb_device().attach("Safari")
script = process.create_script(frida_code)
script.on('message', message_callback)
script.load()

sys.stdin.read()
Start Safari on the iOS device. Run the above Python script on your connected host and open the device log (we'll explain how to open them in the following section). Try opening a new URL in Safari; you should see Frida's output in the logs.

Of course, this example illustrates only one of the things you can do with Frida. To unlock the tool's full potential, you should learn to use its JavaScript API. The documentation section of the Frida website has a tutorial and examples of Frida usage on iOS.
Frida JavaScript API reference
Monitoring Console Logs
Many apps log informative (and potentially sensitive) messages to the console log. The log also contains crash reports and other useful information. You can collect console logs through the Xcode "Devices" window as follows:
- Launch Xcode.
- Connect your device to your host computer.
- Choose Devices from the window menu.
- Click on your connected iOS device in the left section of the Devices window.
- Reproduce the problem.
- Click the triangle-in-a-box toggle located in the lower left-hand corner of the Devices window's right section to view the console log's contents.
To save the console output to a text file, go to the bottom right and click the circular downward-pointing-arrow icon.
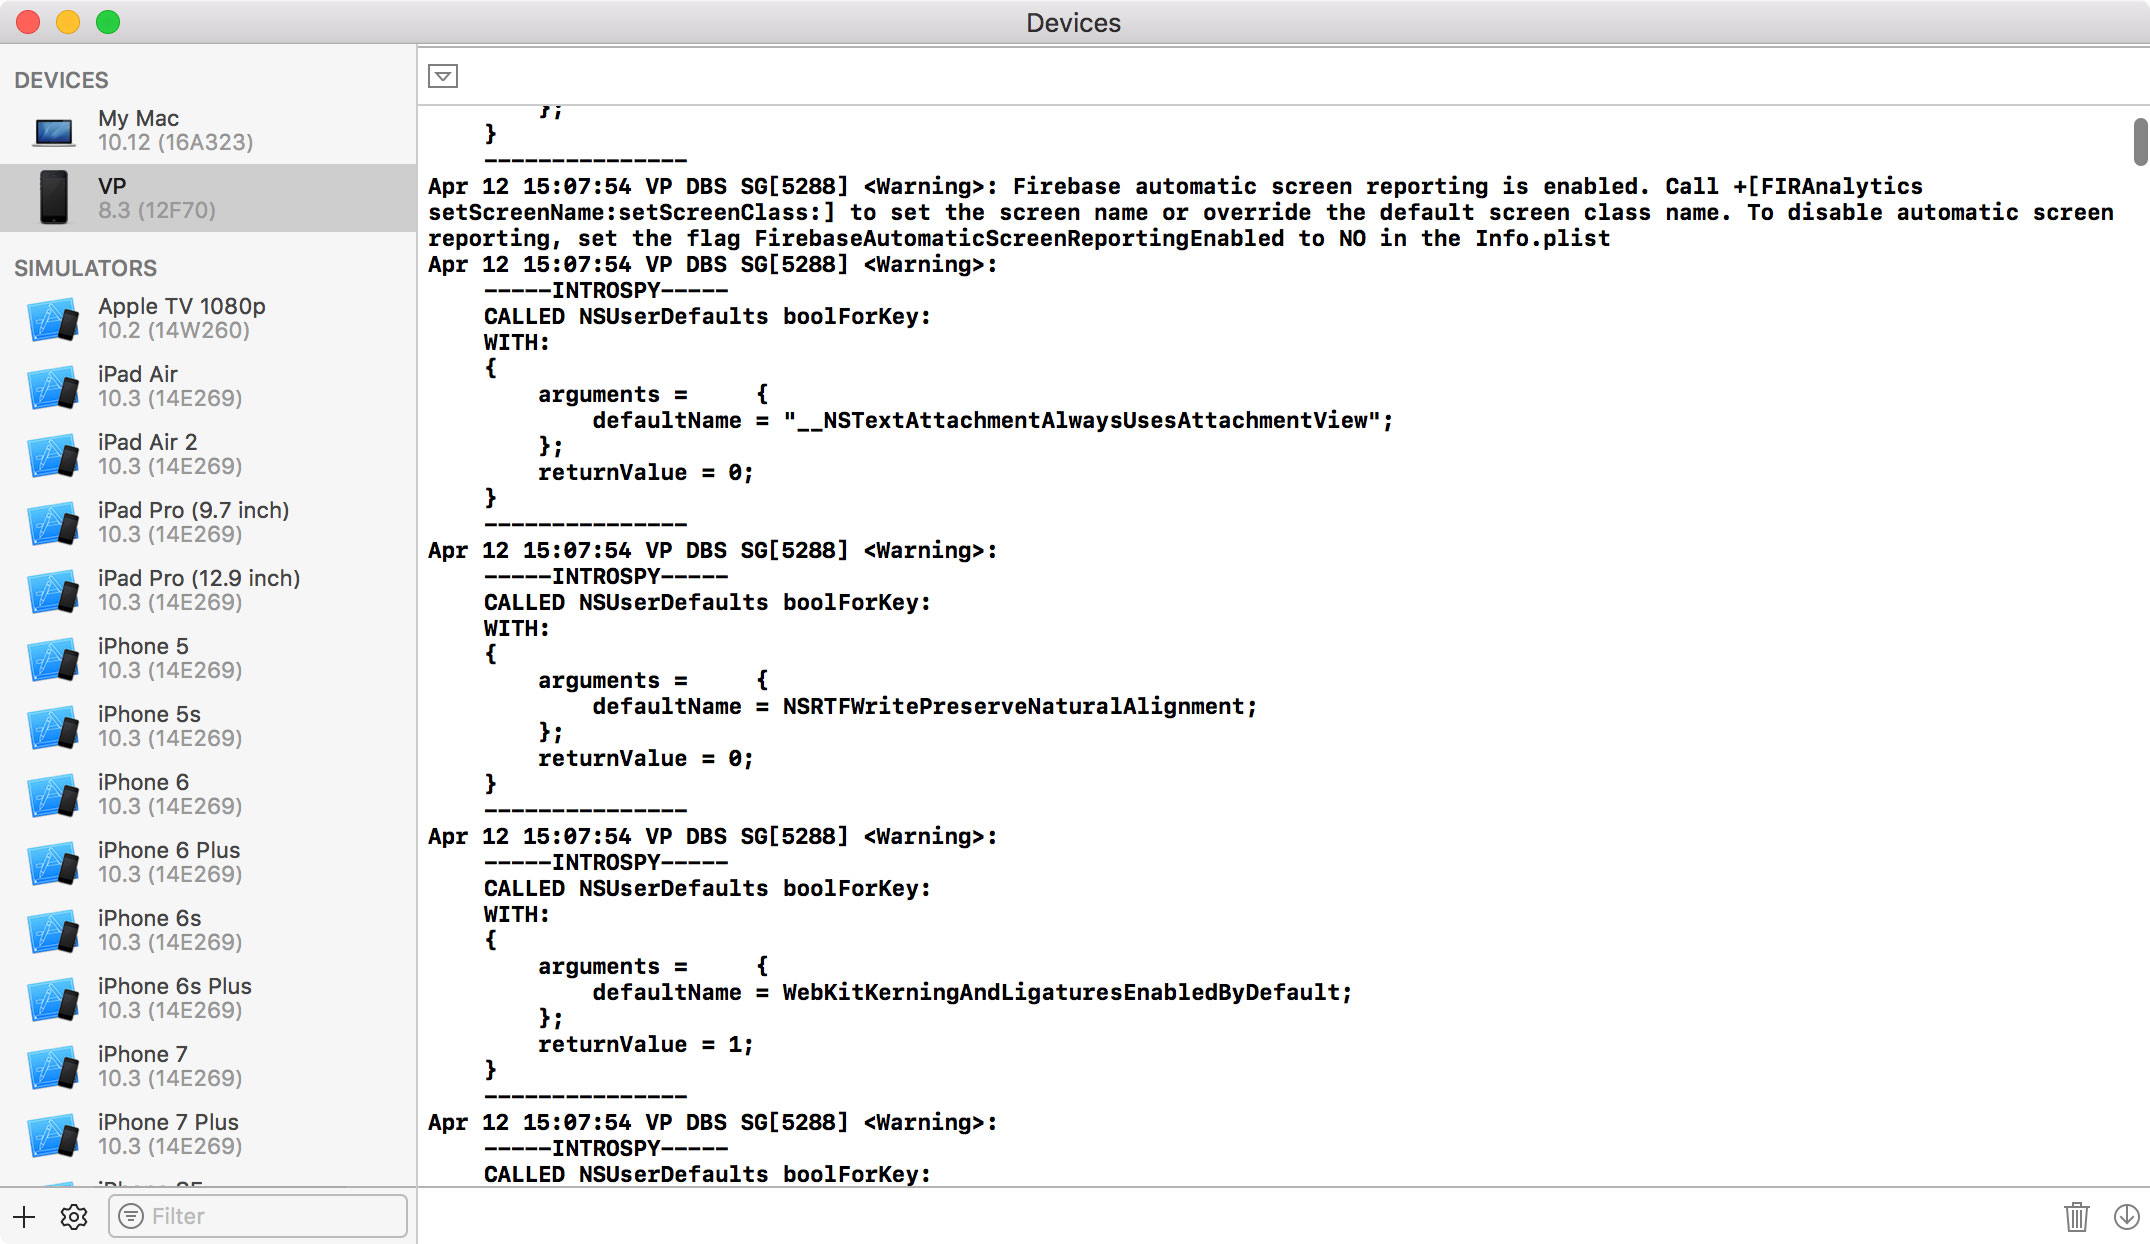
- Monitoring console logs through Xcode
Setting up a Web Proxy with Burp Suite
Burp Suite is an integrated platform for security testing mobile and web applications. Its tools work together seamlessly to support the entire testing process, from initial mapping and analysis of attack surfaces to finding and exploiting security vulnerabilities. Burp proxy operates as a web proxy server for Burp Suite, which is positioned as a man-in-the-middle between the browser and web server(s). Burp Suite allows you to intercept, inspect, and modify incoming and outgoing raw HTTP traffic.
Setting up Burp to proxy your traffic is pretty straightforward. We assume that you have an iOS device and workstation connected to a Wi-Fi network that permits client-to-client traffic. If client-to-client traffic is not permitted, you can use usbmuxd to connect to Burp via USB.
Portswigger provides a good tutorial on setting up an iOS Device to work with Burp and a tutorial on installing Burp's CA certificate to an iOS device .
Bypassing Certificate Pinning
[SSL Kill Switch 2](https://github.com/nabla-c0d3/ssl-kill-switch2 "SSL Kill Switch 2") is one means of disabling certificate pinning. It can be installed via the Cydia store. It will hook on all high-level API calls and bypass certificate pinning.
The Burp Suite app "Mobile Assistant" can also be used to bypass certificate pinning.
In some cases, certificate pinning is tricky to bypass. Look for the following when you can access the source code and recompile the app:
- the API calls
NSURLSession,CFStream, andAFNetworking - methods/strings containing words like 'pinning', 'X509', 'Certificate', etc.
If you don't have access to the source, you can try binary patching or runtime manipulation:
- If OpenSSL certificate pinning is implemented, you can try binary patching.
- Applications written with Apache Cordova or Adobe Phonegap use a lot of callbacks. Look for the callback function that's called on success and manually call it with Cycript.
- Sometimes, the certificate is a file in the application bundle. Replacing the certificate with Burp's certificate may be sufficient, but beware the certificate's SHA sum. If it's hardcoded into the binary, you must replace it too!
Certificate pinning is a good security practice and should be used for all applications that handle sensitive information. EFF's Observatory lists the root and intermediate CAs that major operating systems automatically trust. Please refer to the map of the roughly 650 organizations that are Certificate Authorities Mozilla or Microsoft trust (directly or indirectly). Use certificate pinning if you don't trust at least one of these CAs.
If you want to get more details about white box testing and usual code patterns, refer to "iOS Application Security" by David Thiel. It contains descriptions and code snippets illustrating the most common certificate pinning techniques.
To get more information about testing transport security, please refer to the section "Testing Network Communication."
Network Monitoring/Sniffing
You can remotely sniff all traffic in real-time on iOS by creating a Remote Virtual Interface for your iOS device. First make sure you have Wireshark installed on your macOS machine.
- Connect your iOS device to your macOS machine via USB.
- Make sure that your iOS device and your macOS machine are connected to the same network.
- Open "Terminal" on macOS and enter the following command:
$ rvictl -s x, where x is the UDID of your iOS device. You can find the UDID of your iOS device via iTunes. - Launch Wireshark and select "rvi0" as the capture interface.
- Filter the traffic in Wireshark to display what you want to monitor (for example, all HTTP traffic sent/received via the IP address 192.168.1.1).
ip.addr == 192.168.1.1 && http