Tampering and Reverse Engineering on iOS
Swift and Objective-C
Since Objective-C and Swift are fundamentally different, the programming language in which the app is written affects the possibilities for reverse engineering it. For example, Objective-C allows changing method invocations at runtime. This makes it easy to hook in other functions in an app, which is heavily used by Cycript and other reverse engineering tools. This "method swizzling" is not implemented in the same way in Swift, which makes it harder to do than in Objective-C.
The majority of this chapter is relevant to applications written in Objective-C or having bridged types, which are types compatible with both Swift and Objective-C. Most tools that currently work well with Objective-C are working on improving their compatibility with Swift. For example, Frida currently does support Swift bindings.
XCode and iOS SDK
XCode is an Integrated Development Environment (IDE) for macOS containing a suite of software development tools developed by Apple for developing software for macOS, iOS, watchOS and tvOS. The latest release as of the writing of this book is XCode 8 which can be downloaded from the official Apple website.
The iOS SDK (Software Development Kit), formerly known as iPhone SDK, is a software development kit developed by Apple for developing native applications for iOS. The latest release as of the writing of this book is iOS 10 SDK and it can be downloaded from the Official Apple website as well.
Utilities
Class-dump by Steve Nygard is a command-line utility for examining the Objective-C runtime information stored in Mach-O (Mach object) files. It generates declarations for the classes, categories and protocols.
Class-dump-z is a rewrite of class-dump from scratch using C++, avoiding using dynamic calls. Removing these unnecessary calls makes class-dump-z nearly 10 times faster than the precedences.
Class-dump-dyld by Elias Limneos allows dumping and retrieving symbols directly from the shared cache, eliminating the need to extract the files first. It can generate header files from app binaries, libraries, frameworks, bundles or the whole dyld_shared_cache. Is is also possible to Mass-dump the whole dyld_shared_cache or directories recursively.
MachoOView is a useful visual Mach-O file browser that also allows in-file editing of ARM binaries.
otool is a tool to display specified parts of object files or libraries. It understands both Mach-O files and universal file formats.
Reversing Frameworks
Radare2 is a complete framework for reverse-engineering and analyzing. It is built around the Capstone disassembler, Keystone assembler, and Unicorn CPU emulation engine. Radare2 has support for iOS binaries and many useful iOS-specific features, such as a native Objective-C parser, and an iOS debugger.
Commercial Disassemblers
IDA Pro can deal with iOS binaries and has a built-in iOS debugger. IDA is widely seen as the gold standard for GUI-based, interactive static analysis, but it isn't cheap. For the more budget-minded reverse engineer, Hopper offers similar static analysis features.
Reverse Engineering iOS Apps
iOS reverse engineering is a mixed bag. On the one hand, apps programmed in Objective-C and Swift can be disassembled nicely. In Objective-C, object methods are called through dynamic function pointers called "selectors", which are resolved by name during runtime. The advantage of this is that these names need to stay intact in the final binary, making the disassembly more readable. Unfortunately, this also has the effect that no direct cross-references between methods are available in the disassembler, and constructing a flow graph is challenging.
In this guide, we'll give an introduction on static and dynamic analysis and instrumentation. Throughout this chapter, we refer to the OWASP UnCrackable Apps for iOS, so download them from MSTG repository if you're planning to follow the examples.
Static Analysis
Getting the IPA File from an OTA Distribution Link
During development, apps are sometimes provided to testers via over-the-air (OTA) distribution. In that case, you will receive an itms-services link such as the following:
itms-services://?action=download-manifest&url=https://s3-ap-southeast-1.amazonaws.com/test-uat/manifest.plist
You can use the ITMS services asset downloader tool to download the IPS from an OTA distribution URL. Install it via npm as follows:
npm install -g itms-services
Save the IPA file locally with the following command:
# itms-services -u "itms-services://?action=download-manifest&url=https://s3-ap-southeast-1.amazonaws.com/test-uat/manifest.plist" -o - > out.ipa
Recovering an IPA File From an Installed App
From Jailbroken Devices
You can use Saurik's IPA Installer Console to recover IPAs from apps installed on the device. To do this, install IPA Installer Console via Cydia. Then, ssh into the device and look up the bundle id of the target app. For example:
iPhone:~ root# ipainstaller -l
com.apple.Pages
com.example.targetapp
com.google.ios.youtube
com.spotify.client
Generate the IPA file for using the following command:
iPhone:~ root# ipainstaller -b com.example.targetapp -o /tmp/example.ipa
From non-Jailbroken Devices
If the app is available on iTunes, you are able to recover the IPA on MacOS with the following simple steps:
- Download the app in iTunes
- Go to your iTunes Apps Library
- Right-click on the app and select show in finder
Dumping Decrypted Executables
On top of code signing, apps distributed via the app store are also protected using Apple's FairPlay DRM system. This system uses asymmetric cryptography to ensure that any app (including free apps) obtained from the app store only executes on the particular device it is approved to run on. The decryption key is unique to the device and burned into the processor. As of now, the only possible way to obtain the decrypted code from a FairPlay-decrypted app is dumping it from memory while the app is running. On a jailbroken device, this can be done with Clutch tool that is included in standard Cydia repositories [2]. Use clutch in interactive mode to get a list of installed apps, decrypt them and pack to IPA file:
# Clutch -i
NOTE: Only applications distributed with AppStore are protected with FairPlay DRM. If you obtained your application compiled and exported directly from XCode, you don't need to decrypt it. The easiest way is to load the application into Hopper and check if it's being correctly disassembled. You can also check it with otool:
# otool -l yourbinary | grep -A 4 LC_ENCRYPTION_INFO
If the output contains cryptoff, cryptsize and cryptid fields, then the binary is encrypted. If the output of this command is empty, it means that binary is not encrypted. Remember to use otool on binary, not on the IPA file.
Getting Basic Information with Class-dump and Hopper Disassembler
Class-dump tool can be used to get information about methods in the application. Example below uses Damn Vulnerable iOS Application. As our binary is so-called fat binary, which means that it can be executed on 32 and 64 bit platforms:
$ unzip DamnVulnerableiOSApp.ipa

$ cd Payload/DamnVulnerableIOSApp.app

$ otool -hv DamnVulnerableIOSApp

DamnVulnerableIOSApp (architecture armv7):
Mach header
      magic cputype cpusubtype  caps    filetype ncmds sizeofcmds      flags
   MH_MAGIC     ARM         V7  0x00     EXECUTE    38       4292   NOUNDEFS DYLDLINK TWOLEVEL WEAK_DEFINES BINDS_TO_WEAK PIE

DamnVulnerableIOSApp (architecture arm64):
Mach header
      magic cputype cpusubtype  caps    filetype ncmds sizeofcmds      flags
MH_MAGIC_64   ARM64        ALL  0x00     EXECUTE    38       4856   NOUNDEFS DYLDLINK TWOLEVEL WEAK_DEFINES BINDS_TO_WEAK PIE
Note architecture armv7 which is 32 bit and arm64. This design permits to deploy the same application on all devices.
In order to analyze the application with class-dump we must create so-called thin binary, which contains only one architecture:
iOS8-jailbreak:~ root# lipo -thin armv7 DamnVulnerableIOSApp -output DVIA32
And then we can proceed to performing class-dump:
iOS8-jailbreak:~ root# class-dump DVIA32

@interface FlurryUtil : ./DVIA/DVIA/DamnVulnerableIOSApp/DamnVulnerableIOSApp/YapDatabase/Extensions/Views/Internal/
{
}
+ (BOOL)appIsCracked;
+ (BOOL)deviceIsJailbroken;
Note the plus sign, which means that this is a class method returning BOOL type. A minus sign would mean that this is an instance method. Please refer to further sections to understand the practical difference between both.
Alternatively, you can easily decompile the application with Hopper Disassembler. All these steps will be performed automatically and you will be able to see disassembled binary and class information.
Other commands:
Listing shared libraries:
$ otool -L <binary>
Debugging
Debugging on iOS is generally implemented via Mach IPC. To "attach" to a target process, the debugger process calls the task_for_pid() function with the process id of the target process to and receives a Mach port. The debugger then registers as a receiver of exception messages and starts handling any exceptions that occur in the debuggee. Mach IPC calls are used to perform actions such as suspending the target process and reading/writing register states and virtual memory.
Even though the XNU kernel implements the ptrace() system call as well, some of its functionality has been removed, including the capability to read and write register states and memory contents. Even so, ptrace() is used in limited ways by standard debuggers such as lldb and gdb. Some debuggers, including Radare2's iOS debugger, don't invoke ptrace at all.
Using lldb
iOS ships with a console app, debugserver, that allows for remote debugging using gdb or lldb. By default however, debugserver cannot be used to attach to arbitrary processes (it is usually only used for debugging self-developed apps deployed with XCode). To enable debugging of third-part apps, the task_for_pid entitlement must be added to the debugserver executable. An easy way to do this is adding the entitlement to the debugserver binary shipped with XCode.
To obtain the executable mount the following DMG image:
/Applications/Xcode.app/Contents/Developer/Platforms/iPhoneOS.platform/ DeviceSupport/<target-iOS-version//DeveloperDiskImage.dmg
You’ll find the debugserver executable in the /usr/bin/ directory on the mounted volume - copy it to a temporary directory. Then, create a file called entitlements.plist with the following content:
<?xml version="1.0" encoding="UTF-8"?>
<!DOCTYPE plist PUBLIC "-//Apple//DTD PLIST 1.0//EN" "http://www.apple.com/DTDs/ PropertyList-1.0.dtd">
<plist version="1.0">
<dict>
    <key>com.apple.springboard.debugapplications</key>
    <true/>
    <key>run-unsigned-code</key>
    <true/>
    <key>get-task-allow</key>
    <true/>
    <key>task_for_pid-allow</key>
    <true/>
</dict>
</plist>
And apply the entitlement with codesign:
codesign -s - --entitlements entitlements.plist -f debugserver
Copy the modified binary to any directory on the test device (note: The following examples use usbmuxd to forward a local port through USB).
$ ./tcprelay.py -t 22:2222
$ scp -P2222 debugserver root@localhost:/tmp/
You can now attach debugserver to any process running on the device.
VP-iPhone-18:/tmp root# ./debugserver *:1234 -a 2670
debugserver-@(#)PROGRAM:debugserver  PROJECT:debugserver-320.2.89
 for armv7.
Attaching to process 2670...
Cycript and Cynject
Cydia Substrate (formerly called MobileSubstrate) is the de-facto standard framework for developing run-time patches (“Cydia Substrate extensions”) on iOS. It comes with Cynject, a tool that provides code injection support for C. Cycript is a scripting language developed by Jay Freeman (saurik). Cycript injects a JavaScriptCore VM into the running process. Users can then manipulate the process using a hybrid of Objective-C++ and JavaScript syntax through the Cycript interactive console. It is also possible to access and instantiate Objective-C classes inside a running process. Some examples for the use of Cycript are listed in the iOS chapter.
First the SDK need to be downloaded, unpacked and installed.
$ wget https://cydia.saurik.com/api/latest/3 -O cycript.zip && unzip cycript.zip
#on iphone
$ sudo cp -a Cycript.lib/*.dylib /usr/lib
$ sudo cp -a Cycript.lib/cycript-apl /usr/bin/cycript
To spawn the interactive cycript shell, you can run “./cyript” or just “cycript” if cycript is on your path.
$ cycyript
cy#
To inject into a running process, we need to first find out the process ID (PID). We can run "cycript -p" with the PID to inject cycript into the process. To illustrate we will inject into springboard.
$ ps -ef | grep SpringBoard
501 78 1 0 0:00.00 ?? 0:10.57 /System/Library/CoreServices/SpringBoard.app/SpringBoard
$ ./cycript -p 78
cy#
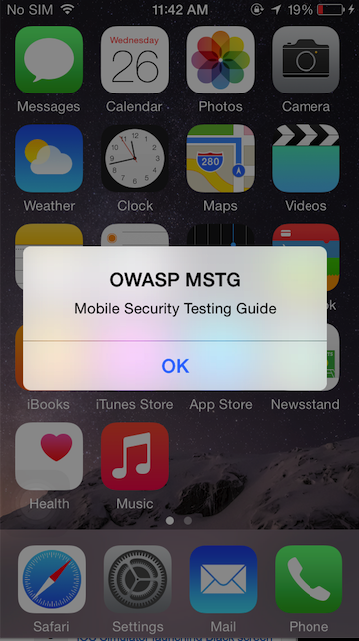
We have injected cycript into SpringBoard, lets try to trigger an alert message on SpringBoard with cycript.
cy# alertView = [[UIAlertView alloc] initWithTitle:@"OWASP MSTG" message:@"Mobile Security Testing Guide"  delegate:nil cancelButtonitle:@"OK" otherButtonTitles:nil]
#"<UIAlertView: 0x1645c550; frame = (0 0; 0 0); layer = <CALayer: 0x164df160>>"
cy# [alertView show]
cy# [alertView release]
Discover the document directory with cycript:
cy# [[NSFileManager defaultManager] URLsForDirectory:NSDocumentDirectory inDomains:NSUserDomainMask][0]
#"file:///var/mobile/Containers/Data/Application/A8AE15EE-DC8B-4F1C-91A5-1FED35212DF/Documents/"
Get the delegate class for the application using the command below:
cy# [UIApplication sharedApplication].delegate
The command [[UIApp keyWindow] recursiveDescription].toString() returns the view hierarchy of keyWindow. The description of every subview and sub-subview of keyWindow will be shown and the indentation space reflects the relationships of each views. For an example UILabel, UITextField and UIButton are subviews of UIView.
cy# [[UIApp keyWindow] recursiveDescription].toString()
`<UIWindow: 0x16e82190; frame = (0 0; 320 568); gestureRecognizers = <NSArray: 0x16e80ac0>; layer = <UIWindowLayer: 0x16e63ce0>>
   | <UIView: 0x16e935f0; frame = (0 0; 320 568); autoresize = W+H; layer = <CALayer: 0x16e93680>>
   |    | <UILabel: 0x16e8f840; frame = (0 40; 82 20.5); text = 'i am groot!'; hidden = YES; opaque = NO; autoresize = RM+BM; userInteractionEnabled = NO; layer = <_UILabelLayer: 0x16e8f920>>
   |    | <UILabel: 0x16e8e030; frame = (0 110.5; 320 20.5); text = 'A Secret Is Found In The ...'; opaque = NO; autoresize = RM+BM; userInteractionEnabled = NO; layer = <_UILabelLayer: 0x16e8e290>>
   |    | <UITextField: 0x16e8fbd0; frame = (8 141; 304 30); text = ''; clipsToBounds = YES; opaque = NO; autoresize = RM+BM; gestureRecognizers = <NSArray: 0x16e94550>; layer = <CALayer: 0x16e8fea0>>
   |    |    | <_UITextFieldRoundedRectBackgroundViewNeue: 0x16e92770; frame = (0 0; 304 30); opaque = NO; autoresize = W+H; userInteractionEnabled = NO; layer = <CALayer: 0x16e92990>>
   |    | <UIButton: 0x16d901e0; frame = (8 191; 304 30); opaque = NO; autoresize = RM+BM; layer = <CALayer: 0x16d90490>>
   |    |    | <UIButtonLabel: 0x16e72b70; frame = (133 6; 38 18); text = 'Verify'; opaque = NO; userInteractionEnabled = NO; layer = <_UILabelLayer: 0x16e974b0>>
   |    | <_UILayoutGuide: 0x16d92a00; frame = (0 0; 0 20); hidden = YES; layer = <CALayer: 0x16e936b0>>
   |    | <_UILayoutGuide: 0x16d92c10; frame = (0 568; 0 0); hidden = YES; layer = <CALayer: 0x16d92cb0>>`
Hooking native functions & objective-C methods
- Install the application to be hooked.
- Run the application and make it sure the app is in foreground (should not be in paused state).
- Find the PID of the app using the command:
ps ax | grep App. - Hook into the running process by using the command:
cycript -p PID. - Cycript interpreter will be provided, on successful hooking. You can get the instance of the application by using the Objective-C syntax
[UIApplication sharedApplication].
cy# [UIApplication sharedApplication]
cy# var a = [UIApplication sharedApplication]
- To find the delegate class of this application:
cy# a.delegate - Let’s print out the methods for AppDelegate class:
cy# printMethods (“AppDelegate”)
Installing Frida
Frida is a runtime instrumentation framework that lets you inject JavaScript snippets or portions of your own library into native Android and iOS apps. If you've already read the Android section of this guide, you should be quite familiar with this tool.
If you haven't already done so, you need to install the Frida Python package on your host machine:
$ pip install frida
To connect Frida to an iOS app, you need a way to inject the Frida runtime into that app. This is easy to do on a jailbroken device: just install frida-server through Cydia. Once it is installed, frida-server will automatically run with root privileges, allowing you to easily inject code into any process.
Start Cydia and add Frida's repository by navigating to Manage -> Sources -> Edit -> Add and entering https://build.frida.re. You should then be able to find and install the Frida package.
Connect your device via USB and make sure that Frida works by running the frida-ps command. This should return the list of processes running on the device:
$ frida-ps -U
PID  Name
---  ----------------
963  Mail
952  Safari
416  BTServer
422  BlueTool
791  CalendarWidget
451  CloudKeychainPro
239  CommCenter
764  ContactsCoreSpot
(...)
We'll demonstrate a few more uses for Frida below, but let's first look at what you should do if you're forced to work on a non-jailbroken device.
Dynamic Analysis on Non-Jailbroken Devices
If you don't have access to a jailbroken device, you can patch and repackage the target app to load a dynamic library at startup. This way, you can instrument the app and do pretty much everything you need to do for a dynamic analysis (of course, you can't break out of the sandbox this way, but you won't often need to). However, this technique works only if the app binary isn't FairPlay-encrypted (i.e., obtained from the app store).
Thanks to Apple's confusing provisioning and code signing system, re-signing an app is more challenging than one would expect. iOS won't run an app unless you get the provisioning profile and code signature header exactly. This requires learning many concepts—certificate types, BundleIDs, application IDs, team identifiers, and how Apple's build tools connect them. Suffice it to say, getting the OS to run a binary that hasn't been built via the default method (Xcode) can be a daunting process.
We're going to use optool, Apple's build tools, and some shell commands. Our method is inspired by Vincent Tan's Swizzler project. The NCC group has described an alternative repackaging method.
To reproduce the steps listed below, download UnCrackable iOS App Level 1 from the OWASP Mobile Testing Guide repo. Our goal is to make the UnCrackable app load FridaGadget.dylib during startup so we can instrument it with Frida.
Please note that the following steps are applicable to macOS only. Xcode is available for macOS only.
Getting a Developer Provisioning Profile and Certificate
The provisioning profile is a plist file signed by Apple. It whitelists your code signing certificate on one or more devices. In other words, this represents Apple's explicitly allowing your app to run for certain reasons, such as debugging on selected devices (development profile). The provisioning profile also includes the entitlements granted to your app. The certificate contains the private key you'll use to sign.
Depending on whether you're registered as an iOS developer, you can obtain a certificate and provisioning profile in one of the following ways:
With an iOS developer account:
If you've developed and deployed iOS apps with Xcode before, you already have your own code signing certificate installed. Use the security tool to list your signing identities:
$ security find-identity -p codesigning -v
  1) 61FA3547E0AF42A11E233F6A2B255E6B6AF262CE "iPhone Distribution: Vantage Point Security Pte. Ltd."
  2) 8004380F331DCA22CC1B47FB1A805890AE41C938 "iPhone Developer: Bernhard Müller (RV852WND79)"
Log into the Apple Developer portal to issue a new App ID, then issue and download the profile. An App ID is a two-part string used consisting of a Team ID supplied by Apple and a bundle ID search string that you can set to an arbitrary value, such as com.example.myapp. Note that you can use a single App ID to re-sign multiple apps. Make sure you create a development profile and not a distribution profile so that you can debug the app.
In the examples below, I use my own signing identity, which is associated with my company's development team. I created the app-id "sg.vp.repackaged" and the provisioning profile "AwesomeRepackaging" for these examples. I ended up with the file AwesomeRepackaging.mobileprovision—replace this with your own filename in the shell commands below.
With a Regular iTunes Account:
Apple will issue a free development provisioning profile even if you're not a paying developer. You can obtain the profile with Xcode and your regular Apple account: simply create an empty iOS project and extract embedded.mobileprovision from the app container, which is in the Xcode subdirectory of your home directory: ~/Library/Developer/Xcode/DerivedData/<ProjectName>/Build/Products/Debug-iphoneos/<ProjectName>.app/. The NCC blog post "iOS instrumentation without jailbreak" explains this process in great detail.
Once you've obtained the provisioning profile, you can check its contents with the security tool. Besides the allowed certificates and devices, you'll find the entitlements granted to the app in the profile. You'll need those for code signing, so extract them to a separate plist file as shown below. Have a look at the file contents to make sure everything is as expected.
$ security cms -D -i AwesomeRepackaging.mobileprovision > profile.plist
$ /usr/libexec/PlistBuddy -x -c 'Print :Entitlements' profile.plist > entitlements.plist
$ cat entitlements.plist
<?xml version="1.0" encoding="UTF-8"?>
<!DOCTYPE plist PUBLIC "-//Apple//DTD PLIST 1.0//EN" "http://www.apple.com/DTDs/PropertyList-1.0.dtd">
<plist version="1.0">
<dict>
    <key>application-identifier</key>
    <string>LRUD9L355Y.sg.vantagepoint.repackage</string>
    <key>com.apple.developer.team-identifier</key>
    <string>LRUD9L355Y</string>
    <key>get-task-allow</key>
    <true/>
    <key>keychain-access-groups</key>
    <array>
        <string>LRUD9L355Y.*</string>
    </array>
</dict>
</plist>
Note the application identifier, which is a combination of the Team ID (LRUD9L355Y) and Bundle ID (sg.vantagepoint.repackage). This provisioning profile is only valid for the app that has this app id. The "get-task-allow" key is also important—when set to "true," other processes, such as the debugging server, are allowed to attach to the app (consequently, this would be set to "false" in a distribution profile).
Other Preparations
To make our app load an additional library at startup, we need some way of inserting an additional load command into the main executable's Mach-O header. Optool can be used to automate this process:
$ git clone https://github.com/alexzielenski/optool.git
$ cd optool/
$ git submodule update --init --recursive
$ xcodebuild
$ ln -s <your-path-to-optool>/build/Release/optool /usr/local/bin/optool
We'll also use ios-deploy, a tool that allows iOS apps to be deployed and debugged without Xcode:
$ git clone https://github.com/phonegap/ios-deploy.git
$ cd ios-deploy/
$ xcodebuild
$ cd build/Release
$ ./ios-deploy
$ ln -s <your-path-to-ios-deploy>/build/Release/ios-deploy /usr/local/bin/ios-deploy
The last line in optool and ios-deploy creates a symbolic link and makes the executable available system-wide.
Reload your shell to make the new commands available:
zsh: # . ~/.zshrc
bash: # . ~/.bashrc
To follow the examples below, you also need FridaGadget.dylib:
$ curl -O https://build.frida.re/frida/ios/lib/FridaGadget.dylib
Besides the tools listed above, we'll be using standard tools that come with macOS and Xcode. Make sure you have the Xcode command line developer tools installed.
Patching, Repackaging, and Re-Signing
Time to get serious! As you already know, IPA files are actually ZIP archives, so you can use any zip tool to unpack the archive. Copy FridaGadget.dylib into the app directory and use optool to add a load command to the "UnCrackable Level 1" binary.
$ unzip UnCrackable_Level1.ipa
$ cp FridaGadget.dylib Payload/UnCrackable\ Level\ 1.app/
$ optool install -c load -p "@executable_path/FridaGadget.dylib"  -t Payload/UnCrackable\ Level\ 1.app/UnCrackable\ Level\ 1
Found FAT Header
Found thin header...
Found thin header...
Inserting a LC_LOAD_DYLIB command for architecture: arm
Successfully inserted a LC_LOAD_DYLIB command for arm
Inserting a LC_LOAD_DYLIB command for architecture: arm64
Successfully inserted a LC_LOAD_DYLIB command for arm64
Writing executable to Payload/UnCrackable Level 1.app/UnCrackable Level 1...
Of course such blatant tampering invalidates the main executable's code signature, so this won't run on a non-jailbroken device. You'll need to replace the provisioning profile and sign both the main executable and FridaGadget.dylib with the certificate listed in the profile.
First, let's add our own provisioning profile to the package:
$ cp AwesomeRepackaging.mobileprovision Payload/UnCrackable\ Level\ 1.app/embedded.mobileprovision
Next, we need to make sure that the BundleID in Info.plist matches the one specified in the profile because the codesign tool will read the Bundle ID from Info.plist during signing; the wrong value will lead to an invalid signature.
$ /usr/libexec/PlistBuddy -c "Set :CFBundleIdentifier sg.vantagepoint.repackage" Payload/UnCrackable\ Level\ 1.app/Info.plist
Finally, we use the codesign tool to re-sign both binaries. Instead of "8004380F331DCA22CC1B47FB1A805890AE41C938," you need to use your signing identity, which you can output by executing the command security find-identity -p codesigning -v.
$ rm -rf Payload/UnCrackable\ Level\ 1.app/_CodeSignature
$ /usr/bin/codesign --force --sign 8004380F331DCA22CC1B47FB1A805890AE41C938  Payload/UnCrackable\ Level\ 1.app/FridaGadget.dylib
Payload/UnCrackable Level 1.app/FridaGadget.dylib: replacing existing signature
entitlements.plist is the file you created earlier, for your empty iOS project.
$ /usr/bin/codesign --force --sign 8004380F331DCA22CC1B47FB1A805890AE41C938 --entitlements entitlements.plist Payload/UnCrackable\ Level\ 1.app/UnCrackable\ Level\ 1
Payload/UnCrackable Level 1.app/UnCrackable Level 1: replacing existing signature
Installing and Running an App
Now you should be ready to run the modified app. Deploy and run the app on the device as follows:
$ ios-deploy --debug --bundle Payload/UnCrackable\ Level\ 1.app/
If everything went well, the app should launch in debugging mode with lldb attached. Frida should now be able to attach to the app as well. You can verify this with the frida-ps command:
$ frida-ps -U
PID  Name
---  ------
499  Gadget

Troubleshooting
When something goes wrong (and it usually does), mismatches between the provisioning profile and code signing header are the most likely causes. Reading the official documentation helps you understand the code signing process. Apple's entitlement troubleshooting page is also a useful resource.
Automated Repackaging with Objection
Objection is a mobile runtime exploration toolkit based on Frida. One of the best things about Objection is that it works even with non-jailbroken devices. It does this by automating the process of app repackaging with FridaGadget.dylib.
We won’t cover Objection in detail in this guide, but you can find exhaustive documentation on the official wiki pages.
Method Tracing with Frida
Intercepting Objective-C methods is a useful iOS security testing technique. For example, you may be interested in data storage operations or network requests. In the following example, we'll write a simple tracer for logging HTTP(S) requests made via iOS standard HTTP APIs. We'll also show you how to inject the tracer into the Safari web browser.
In the following examples, we'll assume that you are working on a jailbroken device. If that's not the case, you need to first follow the steps outlined in the previous section to repackage the Safari app.
Frida comes with frida-trace, a ready-made function tracing tool. frida-trace accepts Objective-C methods via the -m flag. You can pass it wildcards as well—given -[NSURL *], for example, frida-trace will automatically install hooks on all NSURL class selectors. We'll use this to get a rough idea about which library functions Safari calls when the user opens a URL.
Run Safari on the device and make sure the device is connected via USB. Then start frida-trace as follows:
$ frida-trace -U -m "-[NSURL *]" Safari
Instrumenting functions...
-[NSURL isMusicStoreURL]: Loaded handler at "/Users/berndt/Desktop/__handlers__/__NSURL_isMusicStoreURL_.js"
-[NSURL isAppStoreURL]: Loaded handler at "/Users/berndt/Desktop/__handlers__/__NSURL_isAppStoreURL_.js"
(...)
Started tracing 248 functions. Press Ctrl+C to stop.
Next, navigate to a new website in Safari. You should see traced function calls on the frida-trace console. Note that the initWithURL: method is called to initialize a new URL request object.
           /* TID 0xc07 */
  20313 ms  -[NSURLRequest _initWithCFURLRequest:0x1043bca30 ]
 20313 ms  -[NSURLRequest URL]
(...)
 21324 ms  -[NSURLRequest initWithURL:0x106388b00 ]
 21324 ms     | -[NSURLRequest initWithURL:0x106388b00 cachePolicy:0x0 timeoutInterval:0x106388b80
We can look up the declaration of this method on the Apple Developer Website:
- (instancetype)initWithURL:(NSURL *)url;
The method is called with a single argument of type NSURL. According to the documentation, the NSRURL class has a property called absoluteString whose value should be the absolute URL represented by the NSURL object.
We now have all the information we need to write a Frida script that intercepts the initWithURL: method and prints the URL passed to the method. The full script is below. Make sure you read the code and inline comments to understand what's going on.
import sys
import frida


// JavaScript to be injected
frida_code = """

    // Obtain a reference to the initWithURL: method of the NSURLRequest class
    var URL = ObjC.classes.NSURLRequest["- initWithURL:];

    // Intercept the method
    Interceptor.attach(URL.implementation, {
      onEnter: function(args) {

          // We should always initialize an autorelease pool before interacting with Objective-C APIs

        var pool = ObjC.classes.NSAutoreleasePool.alloc().init();

        var NSString = ObjC.classes.NSString;

        // Obtain a reference to the NSLog function, and use it to print the URL value
        // args[2] refers to the first method argument (NSURL *url)

        var NSLog = new NativeFunction(Module.findExportByName('Foundation', 'NSLog'), 'void', ['pointer', '...']);

        NSLog(args[2].absoluteString_());

        pool.release();
      }
    });


"""

process = frida.get_usb_device().attach("Safari")
script = process.create_script(frida_code)
script.on('message', message_callback)
script.load()

sys.stdin.read()
Start Safari on the iOS device. Run the above Python script on your connected host and open the device log (we'll explain how to open them in the following section). Try opening a new URL in Safari; you should see Frida's output in the logs.

Of course, this example illustrates only one of the things you can do with Frida. To unlock the tool's full potential, you should learn to use its JavaScript API. The documentation section of the Frida website has a tutorial and examples of Frida usage on iOS.